
Module 1
Welcome to your first unit of your e-learning. Click on the video below to start the introduction.
What we need to know before we continue:
1.
Understand what each component does
2.
How each component works in the braking system
3.
How to recognise brake system parts
How to identify parts in the system
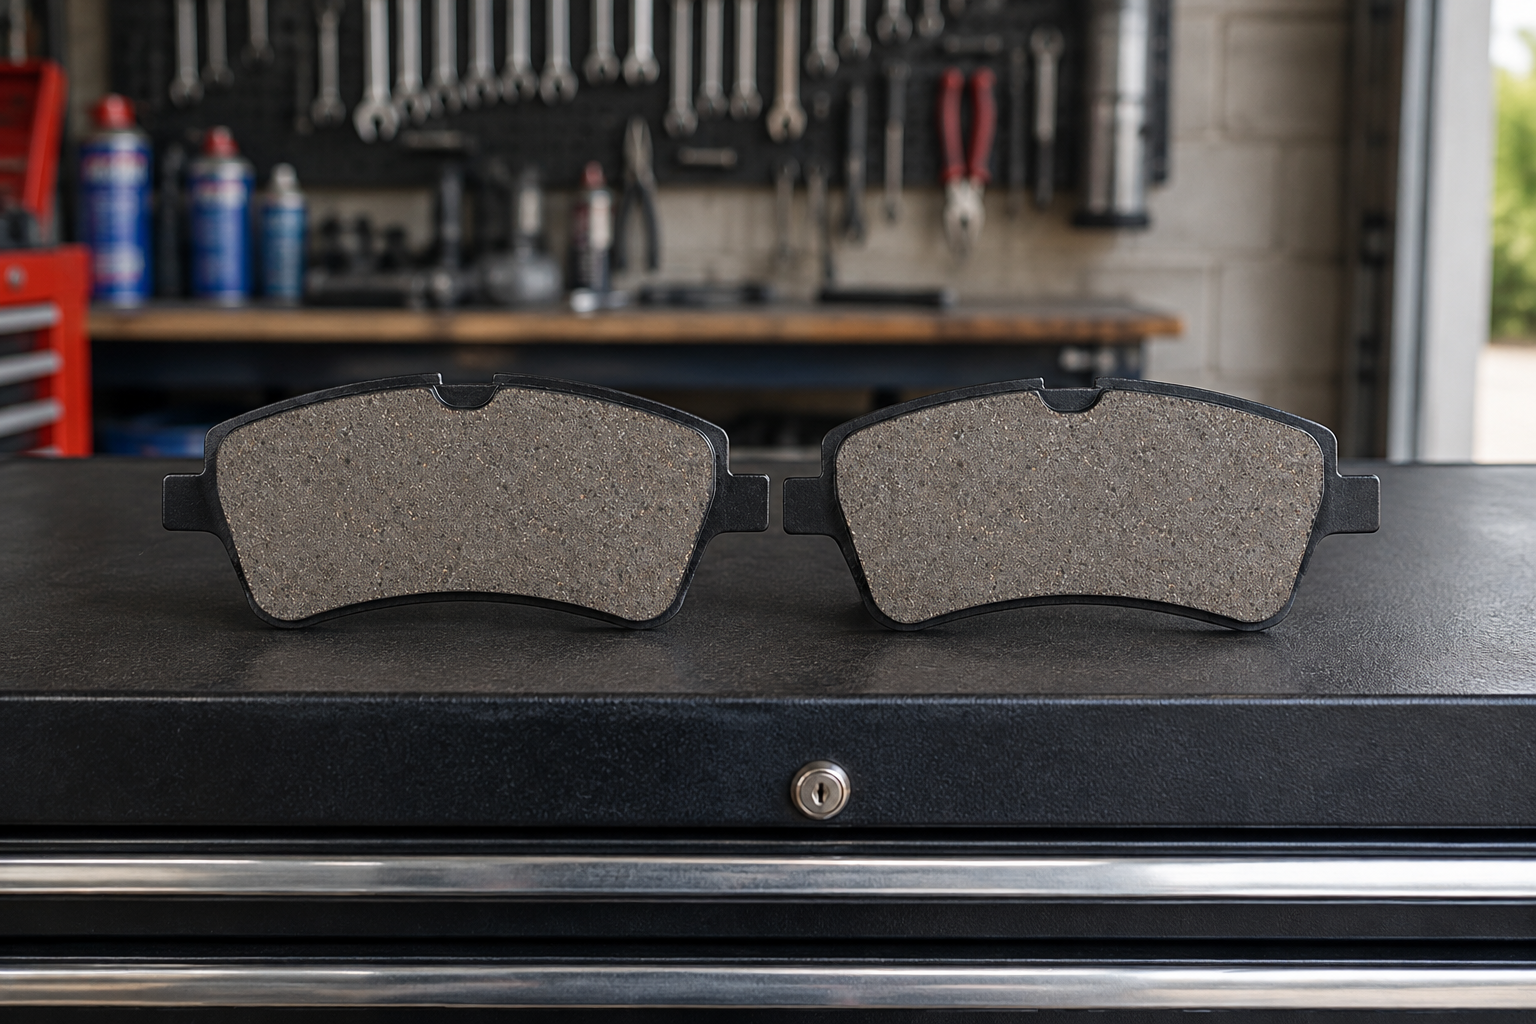
Brake Pads
When you press the brake pedal, they press against the brake disc, creating friction that slows the wheels and brings the vehicle to a stop.
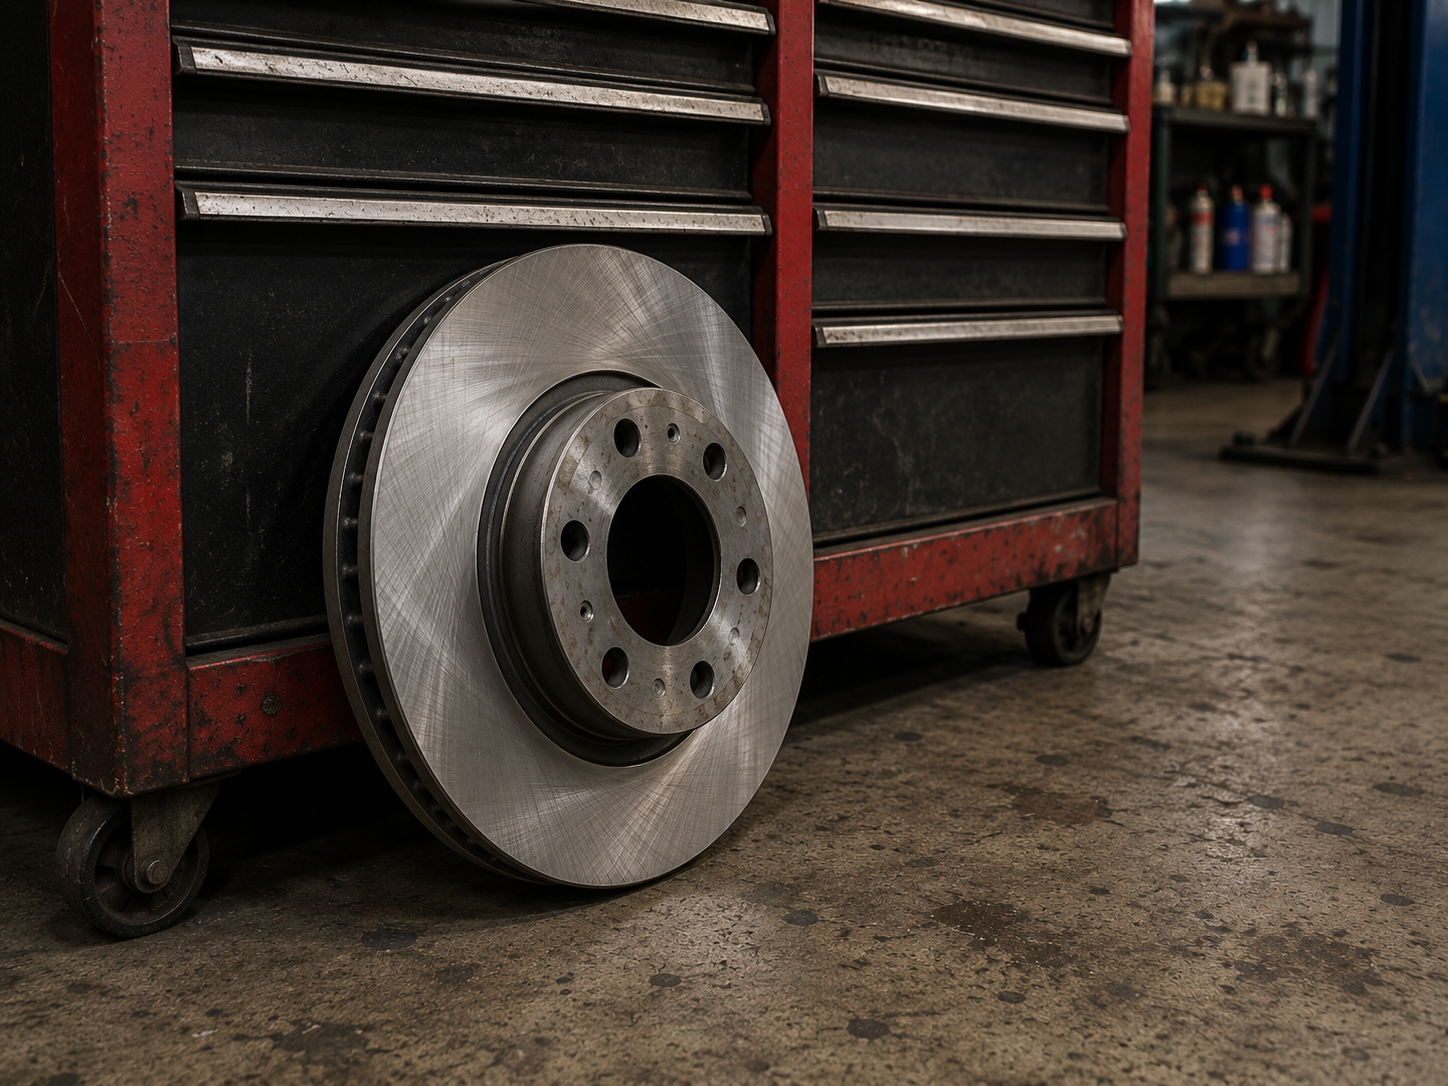
Brake Disc
They rotate with the wheel, and the brake pads clamp against them to create friction. This friction slows the disc and wheel down, helping to bring the vehicle safely to a stop.
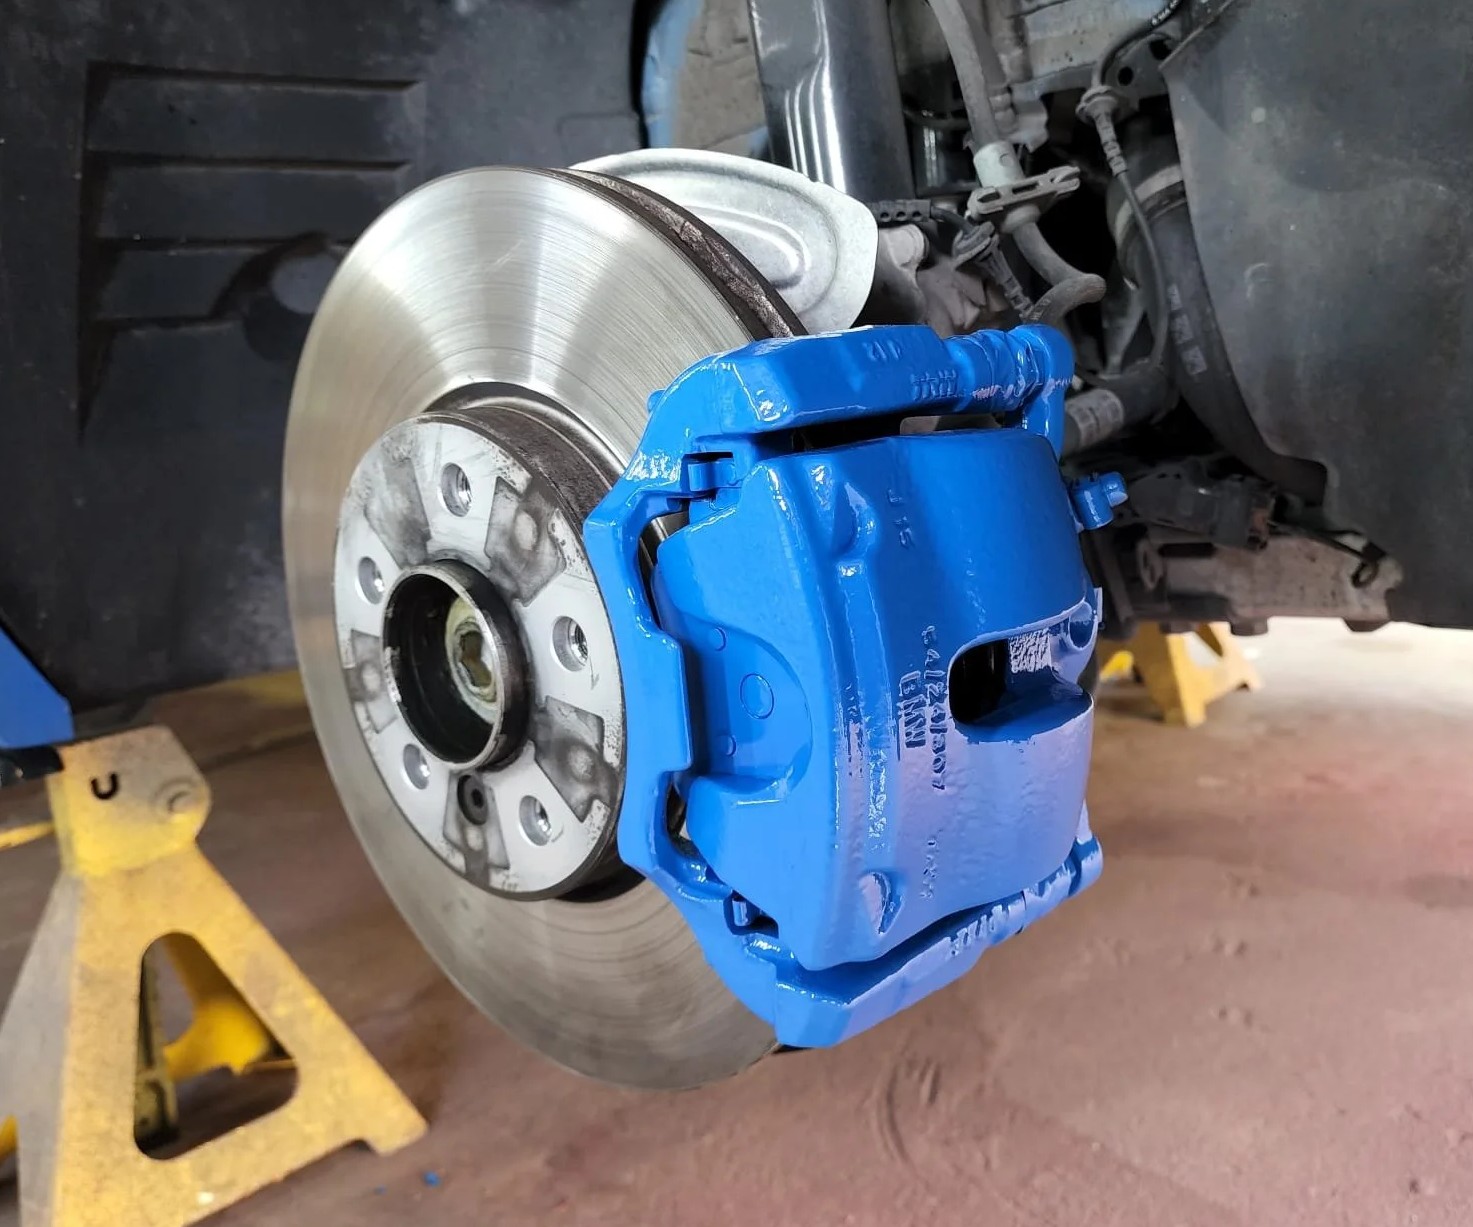
Calliper
They use hydraulic pressure to push the brake pads against the brake disc, creating friction that slows the wheel and helps bring the car to a stop.
Here are the checks required when servicing a brake system
- Check remaining pad thickness and compare it with the manufacturer/service limit.
- Check for uneven wear between the inner and outer pads.
- Look for cracking, chipping, glazing or contamination from oil/grease.
- Check that the pads move freely in the caliper and aren't sticking.
- Inspect the pad retaining clips/shims where fitted.
Check the pad wear indicators/sensors where fitted.
- Measure disc thickness and compare it with the minimum specification.
- Check for excessive scoring, grooves or corrosion.
- Look for cracks, heat damage or blue/discoloured areas.
- Check for excessive wear/lipping around the outer edge.
- Check for significant rust, particularly on the braking surface.
- Check for disc run-out or warping if there is a vibration or other indication.
- Check the calliper for fluid leaks or damage.
- Check that the piston moves correctly.
- Inspect the piston dust boot for tears or deterioration.
- Check that the slider pins/guides move freely on sliding callipers.
- Inspect calliper mounting bolts and brackets.
- Check for corrosion or physical damage.
- Check that the brake pads are seated and moving correctly
How to conduct repairs and replacements: Pads
- Step 1: Prepare the Vehicle
- Step 2: Remove the Wheel
- Step 3: Remove the Old Pads
- Step 4: Prepare & Install the New Pads
- Step 5: Reassemble
- Step 6: Final Safety Checks
Before starting, park the vehicle on a level, stable surface and secure it so it cannot move. Loosen the wheel nuts, raise the vehicle using the correct jacking point, and support it securely with suitable axle stands. Never rely on the jack alone to support the vehicle while working.
Once the vehicle is safely supported, remove the wheel to gain access to the brake assembly. Identify the brake caliper, brake pads and disc, and carry out a quick visual inspection for obvious damage, excessive wear or signs of brake-fluid leakage.
Remove the caliper using the appropriate procedure for the vehicle, taking care not to put strain on the brake hose. Support the caliper securely while removing the old brake pads and any retaining clips or hardware. Take note of how the original components are positioned so the new parts can be installed correctly.
Inspect the brake disc and caliper before fitting the new pads. The caliper piston may need to be retracted to provide enough space for the thicker new pads; use the correct procedure for the vehicle, particularly where an electronic parking brake is fitted. Install the new pads and retaining hardware in the correct positions, ensuring they are seated properly.
Refit the caliper and secure it using the manufacturer’s specified procedure. Reinstall the wheel and tighten the wheel nuts correctly. All relevant fasteners should be tightened to the vehicle manufacturer’s specified torque rather than relying on guesswork.
Before moving the vehicle, press the brake pedal several times until it becomes firm, as the caliper piston will have been retracted during the work. Check the brake-fluid level and inspect the brake assembly for leaks or incorrectly fitted components. Carry out a careful low-speed brake test before returning the vehicle to normal use.
How to conduct repairs and replacements: Disc
Step 1: Prepare the Vehicle
Park the vehicle on a level, stable surface and make sure it is securely immobilised. Loosen the wheel nuts, raise the vehicle using the correct jacking point, and support it safely with suitable axle stands. Make sure the vehicle is secure before starting work.
Step 2: Remove the Wheel
Remove the wheel to gain access to the brake assembly. Identify the brake disc, calliper and associated components. Carry out a visual inspection for signs of excessive wear, corrosion, damage or brake-fluid leakage before continuing.
Step 3: Remove the Brake Calliper and Old Disc
Remove the brake calliper using the correct procedure for the vehicle and support it securely without allowing the brake hose to become strained. Remove the brake pads if necessary, followed by the calliper carrier where required. Once the disc retaining screw or other securing hardware has been removed, remove the old brake disc from the hub.
Step 4: Prepare & Install the New Disc
Clean the hub mounting surface to remove rust, dirt and debris, ensuring the new disc will sit flat against the hub. Clean the new brake disc with an appropriate brake cleaner to remove any protective coating. Position the new disc onto the hub and secure it using the correct retaining hardware.
Step 5: Reassemble
Refit the calliper carrier, brake pads and calliper in the correct positions. Check that all components are correctly seated and that the brake hose has not been twisted or damaged. Tighten the relevant fasteners to the vehicle manufacturer’s specified torque before refitting the wheel.
Step 6: Final Safety Checks
Refit the wheel and tighten the wheel nuts to the manufacturer’s specified torque. Before moving the vehicle, press the brake pedal several times until it becomes firm. Check the brake assembly for any problems and carry out a careful low-speed brake test. New brake discs should also be bedded in according to the manufacturer’s recommendations.
How to conduct repairs and replacements: Calliper
- Step 1: Prepare the Vehicle
- Step 2: Remove the Wheel
- Step 3: Remove the Old Calliper
- Step 4: Prepare & Install the New Calliper
- Step 5: Reassemble & Bleed the Brake System
- Step 6: Final Safety Checks
Park the vehicle on a level, stable surface and make sure it is securely immobilised. Loosen the wheel nuts, raise the vehicle using the correct jacking point, and support it safely with suitable axle stands. Make sure the vehicle is secure before starting work.
Remove the wheel to gain access to the brake caliper and surrounding components. Carry out a visual inspection of the brake system, checking for damaged components, excessive corrosion or signs of brake-fluid leakage.
Remove the brake hose connection and the calliper retaining bolts using the correct procedure for the vehicle. Take care to minimise brake-fluid loss and prevent contamination. Remove the old calliper and support or cap components as appropriate to prevent damage to the brake system.
Compare the replacement calliper with the original to ensure it is the correct part. Position the new calliper correctly and reconnect the brake hose using the specified components. Make sure the brake pads and any retaining hardware are correctly positioned.
Secure the calliper and all associated components using the manufacturer’s specified torque settings. Because the brake hydraulic system has been opened, it will normally need to be bled to remove air. Follow the vehicle manufacturer’s recommended bleeding procedure and use the correct brake fluid specification.
Check the brake-fluid level and inspect all connections for leaks. Press the brake pedal until it is firm and confirm that there is no excessive pedal travel. Refit the wheel and tighten the wheel nuts to the specified torque. Carry out a careful low-speed brake test before returning the vehicle to normal use.